Each router opens its settings when you finish drawing. The m and ft switch at the bottom of the settings sets every length.
How do I save my layout and start a new one?
The top bar
Save, far right
Writes what you have drawn. It reads Saved once it has. The first save asks for a name.
The plus
Starts a new, empty layout.
The stack
Your saved layouts. Click one to open it.
The chain
Opens a layout someone sent you a link to.
How do I share a layout with someone?
The arrow near Save, top right
Click the arrow. A read-only link is copied.
Paste it into an email or a chat. Anyone with it sees the same layout, live, as you change it.
The camera beside it downloads two pictures, the plan and the 3D, for a report or a slide.
What are the keyboard shortcuts?
V
Select
R
Pallet racking
C
Draw a conveyor
G
Draw guarding
Enter
Finish a route
Backspace
Undo the last point of a route
Delete
Remove what's selected
Esc
Clear the selection, or put the tool down
\
Hide or show the catalog
Building
How do I set up the building: walls, roof, columns, dock doors and floor zones?
Facilities - Factory, then Floor marking
One building from the shell in: the walls dragged, the roof chosen, the column grid, doors on two walls, and RECEIVING painted inside the dock.
Pick Building and drag from one corner to the other. The size shows as you drag, and the building settings open with Wall thickness.
On the Roof tab pick Flat, Sloping or Gable and set the heights on the section drawing. Press Place building.
Pick Columns and drag a box round the building. Set Columns along, Columns across and Column size, and press Place columns. The grid is cut to the walls and to the roof above each column.
Pick Dock doors and drag along a wall. Set Door width, Door height and Door to door, and press Place doors. Each wall gets its own run.
Pick Write on the floor, drag a box where the zone is, type its name and press Enter. Set Cap height and Paint, and press Paint it.
Flat
One height, Eave height.
Sloping
Eave height at the low wall, High side height at the other, and which wall is the High side.
Gable
Eave height at both walls, Ridge height in the middle, and which way the Ridge runs.
The building is a drawing on the plan and a set of heights. Racking placed inside keeps 9 in (229 mm) off the walls, steps its frames to the roof above each row, and keeps a clear zone 20 ft deep inside every dock door.
The columns are the obstructions: racking placed over the grid goes round them, and you choose how on the racking settings.
Click a column on the plan while the columns card is open to leave that one out. First column off the wall is half a bay to start.
The letters are painted geometry, so they show in the 3D view and export with the layout. Esc while typing cancels.
I placed the racking and then a column changed. What happens?
Double-click a column → Edit columns
A column taken out of the grid, and the racking closing the gap it left.
Double-click any column and press Edit columns. The grid comes back on the card.
Click a column on the plan to take it out. Click it again to put it back.
Press Re-run columns. The racking over that grid is laid again and the message says how the count moved.
Deleting a column with the Delete key does the same.
The card also has Delete, which removes the whole grid.
Warehousing
How do I draw racking?
Warehousing → Pallet racking, or R
Pick Pallet racking.
Drag from one corner of the floor to the other. Drag along and the bays grow; drag away and the rows grow.
Let go. The racking settings open.
Press Place racks.
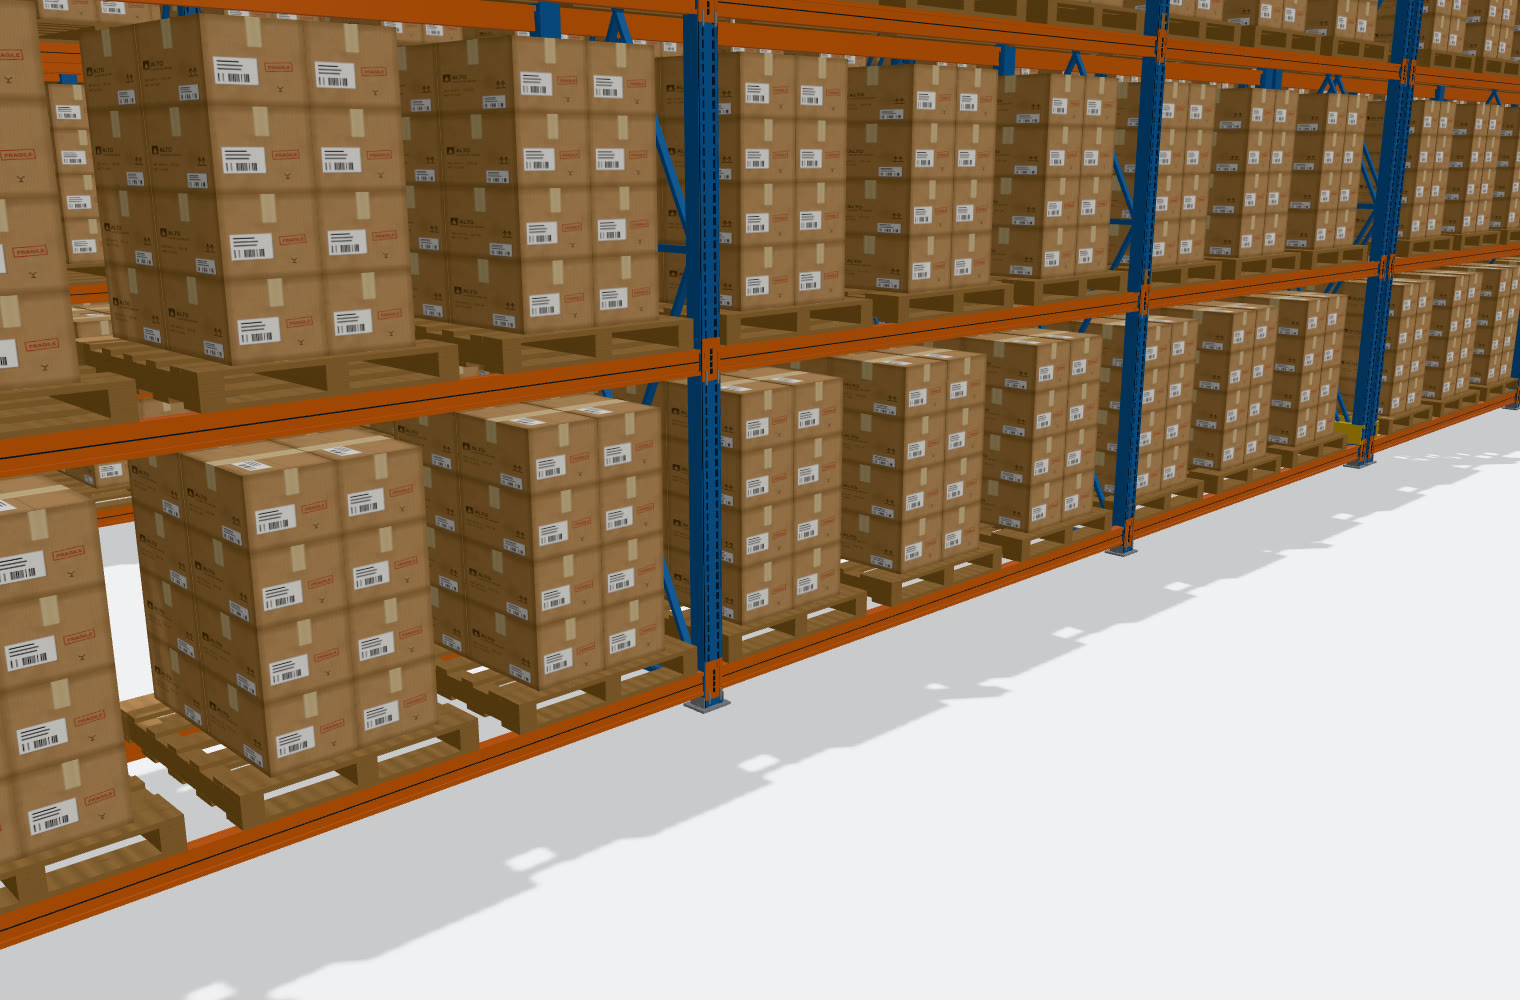
Pallets are added when you place, if Fill with pallets & cases is ticked.
Press Esc to cancel.
How do I lay out drive-in or shuttle racking?
Warehousing → Drive-in racking or Shuttle racking
Shuttle racking placed: a row of 14 lanes, 6 pallets deep, with a forklift aisle in front of the mouths.
Pick the rack and drag the area. The count is lanes, depth, levels and positions.
Set Pallets deep for the lane depth and press Place lanes.
Drive-in
A forklift drives into the lane. 3 deep to start.
Shuttle
A shuttle runs the lane; a forklift or stacker crane works its mouth. 6 deep to start.
A forklift aisle is clear floor, 11.8 ft (3.6 m) between the rack faces. A crane aisle is 5.9 ft (1.8 m) pallet face to pallet face, and the lanes a crane serves carry no wheel stop in its aisle.
How do I lay out cantilever racking for long stock?
Warehousing → Cantilever
Pick Cantilever and drag along the run. The count is bays and arms.
Set the arm length, the levels and the load per arm, and press Place cantilever.
A run stops at a column or a dock door and starts again past it.
How do I add a mezzanine?
Warehousing → Mezzanine
Pick Mezzanine and drag the deck.
Set the deck height, the floor load and which side the stair is on, and press Place mezzanine.
How do I fill a whole building with racking?
Warehousing → Pallet racking, dragged over the building
The racking fills the inside of the walls, round the columns and clear of the dock doors.
Draw the building, its columns and its dock doors first.
Pick Pallet racking and drag a box over the whole building.
The count on the plan is racks, levels, loads across and pallet positions. Press Place racks.
Racking keeps 9 in (229 mm) off the walls and a clear zone inside every dock door.
Under a sloping or gable roof, each row is as tall as the roof above it allows.
What does the racking do about the columns?
Racking settings → Rows and aisle tab → Around columns
The same building three ways. The count in the title changes with the choice.
Most positions
Tries every layout and keeps the one with the most pallet positions. A column standing in a run costs one bay; a shorter bay fills what is left beside it.
Bury in the flue
Turns the rows so the columns land in the flue between back-to-back rows, where every bay keeps its positions.
Drop bays
Keeps the bay grid and drops the bay a column stands in.
Every choice keeps the aisles clear of columns.
What does each racking setting do?
Every field, touched in turn. The drawing on the card lights the part each one sets and the line under it says what it does.
The tabs are the drawing views: Load, Front of a bay, Side of a frame, Rows and aisle.
A field left blank is sized from the pallet and the truck.
The m and ft switch at the bottom of the settings sets every length, here and in the parts list. A number you type is in that unit.
How do I leave out one bay, or a whole row?
Double-click a rack → Edit racking, then click the plan
A bay clicked out of row 03, then row 02 clicked out by its number, then Re-run racking.
Double-click any rack and press Edit racking. The layout comes back on the plan.
Click a bay to take it out. Click the row number at the end of a row to take out the row. Click again to put it back.
Press Re-run racking. The count updates.
The card also has Delete, which removes everything that racking placed.
How do I set the pallet size, how tall the load is and what it weighs?
Type the Load height, pallet included. Taller loads, fewer levels.
Type the Pallet weight, 2200 lb or 1000 kg.
How do I change the aisle width for a forklift, VNA truck or crane?
Racking settings → Rows and aisle tab → Served by
Pick the equipment that works the aisles. Each one needs a different aisle width, and the rows are spaced to match.
Counterbalance forklift to VNA truck: the same floor holds more rows.
Aisles are measured load face to load face. Type your own in Aisle width.
Counterbalance forklift
11.8 ft aisle (3.6 m)
VNA truck
5.9 ft (1.8 m)
Stacker crane
5.6 ft (1.7 m), one crane serving both sides
Person
3.9 ft (1.2 m)
How do I make racking double-deep, or change how many pallets fit in a bay?
Racking settings → Side of a frame tab → Pallets deep; Front of a bay tab → Loads across
Two deep: a second row of frames goes in behind the first on row spacers, and the positions double.
Type 2 in Pallets deep. A second standard frame goes behind each frame on row spacers, with its own beams; a deep-reach truck works both from the one aisle. The parts list doubles the frames and beams and adds the row spacers.
Set Loads across for how many pallets share a beam. The bay width follows.
How do I set the building height, beam length or frame size?
Racking settings → Front of a bay tab → Clear height, Beam length, Frame height; Side of a frame tab → Frame depth
A lower clear height leaves room for fewer levels.
Type the Clear height, in feet or metres as the switch is set. The level count follows.
Leave the sizes blank and they are worked out from the load. Fill them in when you already know the rack you want.
With a vendor picked, Beam length and Frame depth list that maker's sizes.
Beam heights land on the upright's next hole up.
How do I add a stacker crane?
Racking settings → Rows and aisle tab → Served by → Stacker crane
Served by a stacker crane: the aisles close to the crane's width and each gets its own crane.
Draw the racking.
Under Served by, pick Stacker crane.
Press Place racks. The aisles are laid at the crane's width, 5.9 ft (1.8 m) pallet face to pallet face, with a crane in each one.
Racking already placed? Drag a stacker crane from the Warehousing shelf onto one of its aisles. Aisles that can take one turn green; the area is laid again at the crane's aisle width and every aisle in it gets a crane.
Crane aisles go without floor guards.
How do I add cube storage, like AutoStore?
Warehousing → Cube Storage Grid
Drag Cube Storage Grid from the Warehousing shelf onto the plan. It stands in the 3D view as it lands.
Select it and set it up in its settings.
CellsX, CellsY
How many bins across and along. The grid grows to fit.
GridType
DDG, double track both ways, or SDG, single track one way.
ToteStandard
The tote the bins are built around, from 300 × 200 up to 600 × 400.
BinHeight
Sets how many bins stack in a column.
RobotServiceLane
An extra row of track behind the grid for servicing the robots.
How do I add a vertical lift module?
Warehousing → Vertical Lift Module
Drag Vertical Lift Module from the Warehousing shelf onto the plan.
Select it and set it up in its settings.
TrayWidth, TrayDepth
The tray size. The machine is sized around it.
Height
Overall height. It grows if the trays need more.
TrayCount
How many trays, half on each face.
AccessHeight
Floor to the sill of the pick window.
How do I add a storage wall for totes?
Warehousing → Storage Wall
Drag Storage Wall from the Warehousing shelf onto the plan.
Select it and set it up in its settings.
Length, Height, Depth
The size of the enclosure.
BayCount
How many tote positions inside.
KioskCount
Pick stations: one on the end, more along the long face.
How do I get a vendor's part numbers on my parts list?
Racking settings → Front of a bay tab → Vendor
Pick a maker: Interlake, Ridg-U-Rak, Speedrack West, Steel King, Stow or Unarco.
Press Place racks. The parts list carries their part numbers.
A line shows the maker's part number when their sheet ties one to that size, and says "needs one" when it doesn't.
How do I reuse the same racking settings on my next job?
Racking settings → Load tab → Style
Fill in the racking settings.
Click the save icon beside Style, name it, press Enter.
Next time, pick it from Style and every field fills in.
Styles are kept in this browser.
Where do the rack guards go, and how do I turn them off?
Racking settings → Rows and aisle tab → Floor guards
Upright protectors on the face a forklift loads from, corner guards at the ends of each row, and a rail across each end frame. All on the parts list.
Guards follow the aisles. The back of a back-to-back pair and a crane aisle go without.
What's on the racking parts list?
The clipboard button, top bar
Grouped by racking area, each headed by its pallet positions and the load it was designed for. Every line has a quantity, a size, a weight where the vendor lists one, and where its part number came from.
Upright frame
Depth × height. A row of N bays stands on N + 1 frames.
Load beam
Length × face. Ordered each, rated per pair.
Wire deck
Size, and how many a level.
Pallet support bar
A pair per position where a bay holds totes or cartons several deep, or a pallet turned long side to the aisle.
Beam safety pin
Two a beam.
Row spacer
Ties a back-to-back pair, and the two frames of a double-deep line.
Floor anchor
One a column, or what the vendor's sheet says.
Levelling shim
One a column, under the footplate.
Beam tie
Across the pair, on beams over 10 ft.
Upright protector
One on every upright of the load face.
Corner guard
At each end frame facing an aisle.
Frame protector rail
Across each end frame.
The notes under each group give the beam levels and anything still to rate.
How do I show pallet counts on the plan?
Parts panel → Legend
Racks, bays, levels, depth, positions and loaded, per racking area.
Tick Legend and a table appears in the corner of the plan. It prints with a snapshot.
How do I get the parts list into Excel?
Parts panel → download button
Pick m or ft. It is the same switch as on the racking settings.
Click download. An Excel workbook named for the session and its version saves to your computer.
Parts has one row a line, ready to filter and sort. By part totals each part across the plan, ready to order. Lines with no part number are marked To quote in yellow.
How do I put the customer's floor plan under my layout?
The picture button, top bar
Click the picture button. Your file dialog opens.
Pick the drawing: a PNG or JPG of the plan view.
The floor plan stays in your browser window and is left out of the saved session. Export a PDF to an image first.
My floor plan is the wrong size. How do I scale it?
Picture button → Calibrate scale
Press Calibrate scale.
Click both ends of a dimension you can read on the drawing. The longest one you can find is the most accurate.
Type it the way the drawing writes it, 300'-0" or 300ft, and press Set scale.
The same panel sets Opacity, lets you Move the drawing into place, and Replace it with a new revision.
Conveyors
Which conveyors are on the shelf?
The Conveyors shelf
A spiral dropped past the end of the line, turned to take its feed from the west, and its Conveyor Height matched to the hall's belts.
A drawn route is straights and corners. Everything else is a part you drag from the shelf, each with its own inlet and outlets to draw routes from.
Curved Conveyor
A 90° bend on its own.
Merge Conveyor
Two lines in, one out.
Divert Conveyor
One line in, a main out and a branch out. The hall's reject divert is one.
90° Transfer Junction
Straight through, or left and right. The hall's rework rejoin is one.
Checkweigher, Layer Former
A weigh station in the line, and the machine that lays cases out as a pallet layer.
Spiral Conveyor, Inclining Conveyor, Vertical Case Lift
A fixed straight, and a gravity run that bends by hand.
How do I draw a conveyor from one machine to the next?
Conveyors → Draw a conveyor route, or C
Out of the hall outfeed, two corners, into the spiral.
Press C.
Click the start on the outlet: the filled circle with the arrow.
Click each corner. Click the end on the next inlet, and the route settings open.
The route finishes on its own when it lands on an inlet, and both joints are declared with the run.
A free port is drawn filled; a port already joined is hollow. Outlets carry an arrow.
Legs run square: every corner is a 90° turn. Points land on a 4 in (100 mm) grid.
On open floor, Enter or a double-click ends the route. Backspace takes the last point back. Esc drops it.
How do I set the corner radius?
Route settings → A corner tab → Corner radius
Corner radius is the inside radius of each turn. Leave it blank and every corner gets 5 ft (1.5 m). Where a leg is too short for that, the radius steps down until the turn fits. Press Place conveyor and the run is built: straights, bends and supports.
The route takes its height and width from the port it starts on. What you type on the card wins.
With a maker picked, Corner radius lists the bends that maker makes.
How do I add a stop or a sensor?
The Conveyor Utilities shelf
Drag a Conveyor Stop or a Conveyor Sensor to the spot on the run where it belongs. The hall already has an inspect eye before the divert, a reject-arrived eye on the rework return, and a stop at each end.
How do I change level?
A route drawn off the top of a spiral, an incline or a lift
The route out of the spiral's top starts 15 ft up.
A drawn route stays at one height. These parts change it, and the route you draw from their outlet starts at the height they finish at:
Spiral Conveyor, Spiral Conveyor (Down)
A climb in a small footprint.
Inclining Conveyor, Declining Conveyor
A straight run up or down.
Vertical Case Lift, Continuous Vertical Lift
Cases straight up.
Pallet Lift (VRC)
A pallet straight up.
Both ends of a route sit at one height, so a spiral's Conveyor Height is set to the line it joins, and the route leaves from its outlet at the top.
Can a conveyor run overhead?
Route settings → Height
Yes. Above walk-under height, 7 ft (2.1 m), the run hangs from the ceiling on hangers in place of legs. The route off the spiral takes its 15 ft from the spiral's outlet, and the card's drawing shows it; type any height under Height yourself.
How do I make a closed loop?
An accumulation loop north of the line.
Click three or more points.
Click the first point again. The caption says closed loop and the settings open.
How do I set the belt width and the height?
Route settings → Belt width and Height
Belt width
The width of the bed, between the frames. 28 in (720 mm) to start.
Height
Floor to the top of the belt. 33 in (850 mm) to start, or the height of the port the route starts on.
The Across the belt tab draws the bed at the width and height you set.
The m and ft switch at the bottom sets every length on the card.
How do I make a conveyor a belt or a chain?
Route settings → Carries product on
The run up to the spiral reopened and laid again as a tabletop chain.
Drawing a new route, pick it under Carries product on before you press Place conveyor.
For a run already placed, double-click it, press Edit conveyor, pick it and press Re-run conveyor.
Roller
Rollers between the frames. The default.
Belt
A flat belt.
Modular belt
Plastic modules hinged together.
Tabletop chain
Lanes of flat-topped chain, for bottles and cans.
Flexible chain
A plastic chain on an aluminium beam, 45, 65, 85, 105, 180 or 300 mm wide.
Set the width to a flexible chain size before you pick Flexible chain.
A route with a maker picked under Vendor takes what carries it from that maker's range.
How do I get a maker's part numbers?
Route settings → Vendor
Pick the maker under Vendor.
Pick the range under Family, when the maker has more than one.
Corner radius now lists the bends that maker makes. Press Place conveyor.
Makers on file: Ashland, Roach, Dorner, FlexLink, Hytrol, Omni Metalcraft and QC Conveyors.
The card remembers the last maker you picked.
What about the pallet end?
The Robots shelf, then the Conveyors shelf
A palletising robot beside the outfeed, with its pallet conveyor and a turntable.
Pallet Conveyor
A straight chain or roller section for pallets.
Pallet Turntable
Turns a pallet in the line.
90° Pallet Transfer Junction
Sends a pallet straight on or to the side.
Reversible Pallet Build Spur
The spur a palletising robot builds on.
Pallet ports are their own kind, so a case route leaves them alone. Place pallet parts end to end by hand.
How do I change a conveyor after I placed it?
Double-click the run → Edit conveyor
The run up to the spiral, reopened and widened, still on both its ports.
Double-click the run. Its settings panel opens.
Press Edit conveyor. The route settings come back, filled in, still joined to their ports.
Change what you need and press Re-run conveyor.
Belt width, Height and Corner radius can also be typed straight into the settings panel; the run is laid again.
Drag the run on the plan to move it whole.
What goes on the parts list for a conveyor?
The clipboard button, top bar
Every run lists its straights, cut or stock length, its curves, the end drive and the idler, and the supports: brackets, beams and feet, or hangers when it runs overhead. With a maker picked, each line carries that maker's part number. The machines and the shelf parts list themselves.
The download button writes the list as an Excel workbook.
Legend totals the metres of case conveyor and pallet conveyor on the plan.
How do I delete a conveyor?
The loop, selected and deleted with one key.
Select the run and press Delete, or press Delete on its reopened settings. It asks once more, then the whole run goes: straights, corners and supports.
Machines
How do I add a machine and set what goes in and out?
The Machines shelf → Custom machine, then the machine settings → Plan tab
A box dragged on the plan, then a second input set to carry product on a flexible chain.
Open the Machines shelf and click Custom machine.
Drag a box on the plan where the machine stands. The caption gives its size, how many go in and out, and which way it flows.
Set Inputs and Outputs, one to four each. Every one gets its own tab: In 1, In 2, Out 1.
On each tab, pick what it Carries, the Face it is on and its Carrying height.
Carries
Case (case conveyor), Pallet (pallet conveyor) or Product (flexible chain). It picks the conveyor and its colour on the plan.
Face
In end, Out end, Left side or Right side, looking along the flow.
Carrying height
Floor to the carrying surface. 33 in (850 mm) to start.
Conveyor width
28 in (720 mm) for a case and 55 in (1400 mm) for a pallet to start. Product takes Chain size, mm: 45, 65, 85, 105, 180 or 300.
Offset
Moves it along its face from where it sits.
Flow on the Plan tab sets which way product runs through it: the long way of the box, or north, south, east or west.
Ports on one face spread out evenly. An output on the out end lines up with the input that carries the same thing, so a lane runs straight through.
The box grows to hold its ports, and the settings say so.
How do I put robots inside?
Machine settings → Inside tab
Two deltas over the lanes, the box grown to hold them, placed with clear panels.
Pick the Robot: Delta (ABB IRB360), Cobot (UR) or SCARA.
Set How many, the Gripper each holds and the Camera over each.
Press Place machine.
Delta (ABB IRB360)
Hangs from the roof frame, centred over the lanes it picks from and places into.
Cobot (UR)
Stands on a pedestal beside the lanes, on the side of the feed it works.
SCARA
Stands on a pedestal beside the line.
Camera over each
Auto puts one guidance camera over each lane robots pick from. 2D camera or Stereo camera puts one over every robot.
Each robot gets a bay along the line, and the box grows to hold them all. A machine holds up to six.
To add a robot to a machine you already placed, drag a delta, a cobot or a SCARA from the Robots shelf onto it. It gets a new bay, and the box grows longer along the flow.
A gripper from the Robot Tools shelf, dropped by a robot, goes onto that robot in place of the one it held.
A camera dropped on the machine goes over a robot without one, or over the line. One that cannot see across the lane is turned away, and the message says why.
With Robot set to None, Inspection cameras hang cameras over the line on their own.
Panels on the Frame tab is Smoked, Clear or Solid.
Can I start from a ready-made machine?
Machine settings → Plan tab → Start from
A second box started from Cobot packer: its cobot stands beside its side feed.
Draw a Custom machine and pick one under Start from. It fills in the inputs, outputs and robots, and every one can still be changed before you place it.
Delta line
One in, one out, two deltas with their vacuum bars.
Pick and divert
One in, one out, an outlet on the right side, one delta.
Cobot packer
One in, a second in on the left side, one out, a cobot with a vacuum gripper.
The settings open on the last machine you placed. Blank starts again from one in and one out, an empty box.
An outlet on a side beside a lane that runs straight through gets a reject pusher.
How do I join conveyors to it?
Conveyors → Draw a conveyor route, starting on the machine
A route drawn off the machine's outlet. The caption says it will connect.
Arm Draw a conveyor route and click on the machine's outlet. The route starts there.
Click where it goes, and press Place conveyor.
A conveyor placed with its end on a free port is joined to it.
A conveyor joined to a port that carries product becomes a flexible chain at the port's height.
What goes on the parts list for a machine?
The clipboard button, top bar
Each machine is one line to quote, with its size, how many go in and out, and its panels. A reject pusher at a side outlet is a line of its own. The robots, grippers and cameras inside list themselves as catalog parts.
The download button writes the list as an Excel workbook.
How do I change a machine after I placed it?
Double-click the machine → Edit machine
The first machine reopened and its panels made solid.
Double-click the machine. Its settings panel opens.
Press Edit machine. The machine settings come back, filled in.
Change what you need and press Re-run machine. The conveyors on its ports stay joined.
Automation
Which robots are on the shelf?
The Robots shelf
A cobot, a big six-axis arm, a palletising robot and a SCARA, dropped in a row south of the tending cell.
Cobots
ABB GoFa, Doosan M, FANUC CRX and Universal Robots, each with a Model choice.
Six-axis arms
Articulated Robot with a Reach you set, KUKA Quantec, and two arc welders: the generic Arc Welding Robot and the ABB IRB 1600.
Palletising
FANUC M-410iC family and Yaskawa MPL160 II, four-axis.
Delta
ABB IRB 360 FlexPicker, hung overhead.
SCARA and Cartesian
A bench SCARA, and a three-axis portal.
How do I put a robot on a stand?
The Robot Positioners shelf, then the Robots shelf
A Mobile Cobot Column at the blank cart, inside the fence, and the Universal Robots cobot dropped on it.
Put the stand down first: a Robot Pedestal like the one tending the two mills, a Mobile Cobot Column, a Robot Floor Track, an Overhead Robot Track or a Heavy Robot Gantry.
Drag the robot from the Robots shelf and drop it inside the stand's footprint.
The robot seats on the stand's mount, at its real height, and rides it from then on: move the stand and the robot moves with it. A toast names the pair.
The plan draws the stand; the robot riding it shows in the 3D. Click the robot in the 3D to open its settings.
How do I pick the model?
Robot settings → Model
Model lists the maker's arms; pick one and the robot is redrawn at that size, link by link. The generic Articulated Robot takes a Reach instead, 16 in to 15 ft (400 mm to 4.7 m).
How do I put a gripper on the robot?
The Robot Tools shelf
A two-sided gripper adapter dropped on the cobot's flange.
Drag a tool from the Robot Tools shelf and drop it on the robot.
It hangs from the robot's flange, the right way up, and moves with the arm. This works on a robot standing on the floor and on one riding a stand.
Which grippers are there?
The Robot Tools shelf
A Parallel Jaw Gripper on each side of the adapter: one for the blank, one for the finished part.
Custom Fixed Y Dual-Gripper Adapter
Two flanges on one: drop a gripper on each.
Parallel Jaw Gripper
Parts, by the sides.
Carton Clamp Gripper
Cases, by the sides.
Vacuum Gripper, Twin-Cup Vacuum Gripper
Cases and sheets, from the top.
Claw Gripper
Sacks.
Arc Welding Torch
For the welding cell.
How do I check the cell?
The shield button, top bar
A pallet truck left on the finished-part outfeed: found, and named when clicked.
Press the shield. Every part is checked.
A part with a problem turns red; a concern turns amber. Click it to read why.
Clash
Two parts sharing the same space.
People
A person standing inside something, or facing open floor with no work within 8 ft (2.5 m).
Access
A door opening into something, or a part floating with no support under it.
Joints and decks
Joined conveyors that meet at different heights.
Floor
A part sunk into the floor.
Flow
Two ports that touch and are left unjoined.
Robots, tools and stands are left out of the clash check, so an arm swung over a conveyor stays clear.
Click the stand. The Carrying button appears beside it with a count.
Press it, then press Take off on the row.
The part lands on the floor where it stood, with whatever rides it.
How do I set up a welding cell?
The Welding shelf, the Robots shelf, the Robot Tools shelf
The welding cell stood east of the tending cell: a two-station positioner, the welding robot, a fit-up bench and carts, and the torch dropped on the robot.
Put down a Weld Positioner and the Arc Welding Robot facing it, with a Welding Table and parts carts for the fitter.
Drop the Arc Welding Torch on the robot.
Draw the fence round it: the next four topics.
Also on the Welding shelf: a Weld Headstock and a Headstock-Tailstock Positioner. The ABB IRB 1600 arc welder is on the Robots shelf.
How do I fence the cell?
Facilities - Factory → Guarding, or G
Pick Guarding. Click each corner of the fence. Click the first corner again to close it, or press Enter for an open run.
The guarding settings open. The caption counts the length, the legs and the openings, and says when there is no way in for a person yet.
How do I get the fence in a maker's parts, at their height?
Guarding settings → Vendor, Height
Press Place guarding. Panels and posts are laid along the line, cut to length.
Vendor
Posts, panels and doors in this maker's part numbers, on the parts list.
Height
Shown once a maker is picked: the panel heights that maker sells.
With no maker picked, the fence is built from the catalog's own 6 ft 5 in (1.96 m) panel.
Finish on the same card sets the colour.
What happens where a conveyor crosses the fence?
The weldment outfeed crossing the south fence, with the light curtain the fence put there.
The fence leaves an opening for it and puts a Light Curtain across the opening. A machine crossing the line gets a Guard Gate. The caption counts the openings and names what crosses.
How do I put a gate in the fence?
Facilities - Factory shelf → Guard Gate
A gate dropped on the west fence, where the fixture loader stands.
Drag a Guard Gate from the shelf onto the fence line. The panels open up round it, 4 ft (1.2 m) wide. A Light Curtain dropped the same way makes a product opening.
Edit the guarding later and the gate stays where you put it.
What does a tending cell look like at work?
The cell built part by part from the shelf, then running: a UR10e on a mobile stand with a two-sided gripper tends the turning centre, the finished part out and the blank in, in one visit through the door.
The lathe, the fixture table with its nest trays and blanks, the stand, the cobot, the two-sided gripper with a jaw on each side, and the fence drawn round it with a gate. Then it runs: the door opens, the arm goes in with a blank on one side of the gripper, turns, and comes out with the finished part on the other, and the door shuts while the part goes to its nest. Every part came from the shelf and every one is on the parts list. See Let an assistant build it for how a cell is set going.
AI assistants
What can an AI assistant do in Twin Studio?
Claude or ChatGPT, signed in with your Fexel account
Describe what you want in plain words and the assistant builds it with the same routers you use: racking, conveyors, guarding and mezzanines.
It checks the layout for clashes and reach, and hands you the parts list. The layout opens in Twin Studio, where you carry on by hand.
How do I connect Claude Code?
Your terminal
Copy this and run it:
Start Claude Code and type
Pick fexel and sign in with your Fexel account.
How do I connect Claude on the web or the desktop app?
Claude → Settings → Connectors
Click Add custom connector.
Name it Fexel and paste
Click Add, then Connect, and sign in with your Fexel account.
How do I connect ChatGPT?
ChatGPT → Settings → Apps & Connectors
Under Advanced settings, turn on Developer mode.
Click Create, name it Fexel and paste
Set authentication to OAuth, click Create, and sign in with your Fexel account.
Where do the layouts the assistant builds show up?
Twin Studio → your layouts list
In your layouts list, under the Fexel account you signed in with. The assistant also gives you a link to each layout; open it to watch the layout change as the assistant works.
What should I ask it?
Any chat with Fexel connected
Say what you want built, how big, and who works it. Click one to copy it:
Can I see it run before I build it?
Any chat with Fexel connected
The tending cell from the Automation chapter, running: the blank off the cart, into the mill, the door shut, the part out to the outfeed.
Yes. Ask the assistant to run the cell, and what you placed moves the way it will on the floor: the robot loads the mill, the door shuts, the part comes out to the outfeed. Show it to the customer before the purchase order, before the steel is cut, before commissioning.
Export the running layout as USD and it plays in the customer's own tools. The cycle times and the throughput come from simulation later, on that same export; this is the layout seen working.